Monday 28 May 2012

Velux Window Instalation

Since starting the Loft Conversion blog page i have had a chance to
install some Velux Windows for a customer, so can add it here.

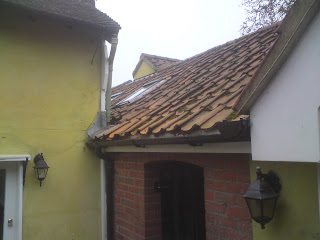
We had to install two Velux Windows in the roof over a dining room, the roof was only single
story height so not hard to get to. In the dining room the ceiling was vaulted for the first foot
or so around the edge, and this is where the windows were to be installed.

Velux Window Instalation
When we looked at the roof to see where the velux windows were to be fitted, we realised the
roof had had lots of patches to the felt under the tiles. We decided it best to re-felt the whole area
we were going to be working on, so stripped back a larger area.
Roof Repairs

Once we had a clear area we began to make the frame work for the new windows.


When we opened the roof we could set where the windows would go, and due to the roof
coming down into a valley the windows would be part in the vaulted ceiling and partly have
a tunnel around them.

Once all the frmework for the roof windows had been finished and the sides of the tunnel had been done,
we had to cover the roof back in with felt and batton.
Roofing Specialists
www.jdppropertymaintenance.co.uk
Roof Repairs/new felt


With the new felt on we could work out the battoning for the tiles and the velux windows
 With the new tile battons in place we could fit the velux window frames and put the windows in then get
on with the roof tiles.
www.jdppropertymaintenance.co.uk
Roofing/Velux
www.jdppropertymaintenance.co.uk
Roof Repairs/Velux Instalation

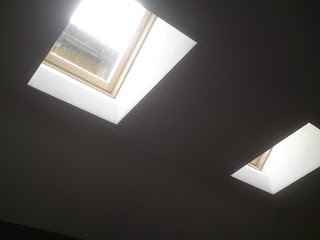
Then the inside was plasterboarded and skimmed and made good where we cut into the ceiling.
www.jdppropertymaintenance.co.uk
Velux Window Fitting

The pictures from inside were hard to capture due to the stream of light from the wonderful
Instalation of Velux Windows, but there you can see, finished neat an tidy.
www.jdppropertymaintenance.co.uk
Velux Window
www.jdppropertymaintenance.co.uk

Saturday 18 February 2012

Huge Ridge Beam for a Loft Conversion & Loft Conversion Pictures

This is a ridge beam for a loft conversion believe it or not.
It was just over seven meters in total and constructed as RB1 and RB2(Ridge Beam 1 & 2)
supported by a glulam post.
RB1 was two timber beams and a steel plate bolted together to form a single member
where as RB2 was just two timbers bolted without steel.
In this picture is the first timber behind the steel plate, supported on a laminated timber post.
The steel 5.15M x 295mm x 10mm and was Very Heavy!
This second picture shows the beam with the second timber installed and some of the bolts.
Here is the second Ridge Beam complete with the joining of the two. Only the steel connection
plate remaining to be bolted in place.
The timber beams were 12"x2" i ran the tape over for a pic, as it had to be special ordered.


Moving the timber and steel into place was very difficult, well timber not so much maybe.
But the Steel was 5.15 meters long 295mm wide and 10mm thick. There was only two of us
doing this whole job so getting the steel up into the roof in the first place was bad enough,
then came the hoisting it into place! As you can see in one of the pictures standing on a
stool to tighten one of the bolts, that was the height we had to lift it. A difficult task and a
little dangerous aswell an certainly not helped by not having any real flooring in place.
It was one of the times you sit back an say "thank f*** that's done".
Two of us a whole day

van having a day off
We had a little bit of bad weather outside and it was a little chilly!
but we carried on in the cold without ev en a offer of a warm cuppa.
inside view befor raters were removed
internal view of the dormer front
external view of dormer


Sunday 5 February 2012

Loft Conversion From Colchester

Hi,

Having a website for my business and putting work pictures on it with basic write up about them, i realised a
blog would accompany it quite well so..........

Loft Conversion

This was a major undertaking, it was a roof with a small loft conversion already in and it gave an added
bedroom however more space was needed. so the house went from looking like this.......


View from in the back garden


View from the front.


A you can see the original loft conversion wasn't any great affair, in fact about as basic an, well, lets face it,
about ugly bugly as you can get for such a construction. I am sure it suited its purpose when it was done originally but the now owner needed a little more space.

To gain what was wanted the roof needed some fundamental changes made to it, it needed to go from a
four sided pitch to a two sided pitch with gable ends. Making that change from four to two makes a big
difference on the area that can be used.

The old roof was deconstructed from right to left looking from the front as you can see
Once so far along the new construction began

The pictures show just how much work is involved in such projects, as its an awful lot! and coupled with the
time it takes to complete its certainly not for the faint hearted.

Once the rafters are all in place the dormers are constructed.
Jumping on a little further with the roof constructed and the dormers all in place, covering the roof and
dormers in felt and battoning for the tiles.
Once at this stage the worst is far behind, and now showing just how much of a transformation the property
has undergone. As the tiles were put on it only got better.
Original plan was to tile the dormers the same as the roof, however, life is flux and a different finish was
decided on.
Finished in black Hardi plank it gave wooden plank look and works very well. Although I'm not a real fan
of the fake wood there is no arguing with it, once its done you don't need to touch it again.
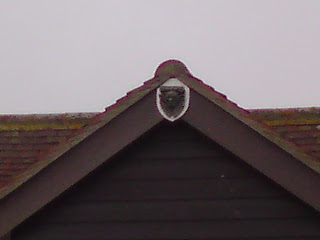
The piste de resistance is the gargoyles adorned on the dormers, wonderful.
This conversion took several months from start to finish, and although not privy to the all of the costs
i would say around £40k wouldn't be too far out and maybe a little under. This one was defiantly a
Don't Move, Improve! as it added value to the property with its size and quality.

For more info in work done visit my website  www.jdppropertymaintenance.co.uk

JDP

 https://www.youtube.com/watch?v=pGMV_VWl0L8